
How to Create a Facebook Photo Album on PC / Mobile
Facebook is one of the most popular social media people use to share their life moments. Also, Facebook has more than 2.9 billion monthly active users, which has made this social media an ideal platform for brands and businesses for digital marketing.
Facebook albums are a helpful way to categorize and organize images. By creating a photo album, Facebook users can share their photos in a beautiful, organized, and organized way.
This article will show you how to use this feature to publish photos in a categorized form on your Facebook profile/page. Then, we will describe the use cases of the Facebook album.
What is a Facebook album?
Albums on Facebook are a feature that allows you to organize a collection of photos/videos based on a specific topic. For example, you can upload photos from a trip, a family gathering, etc. and share them as an album with your friends on Facebook.
Facebook first added this feature to its platform in 2005. At first, a photo album could only contain images. Still, over time, Facebook developed it and added features such as adding descriptions and titles to the album, arranging photos, tagging people, sharing, etc.
How to create a Facebook photo album on a PC
You can create a photo album on a personal computer by visiting the Facebook website, logging in to your account, and following the steps below.
1. Visit the Facebook website.
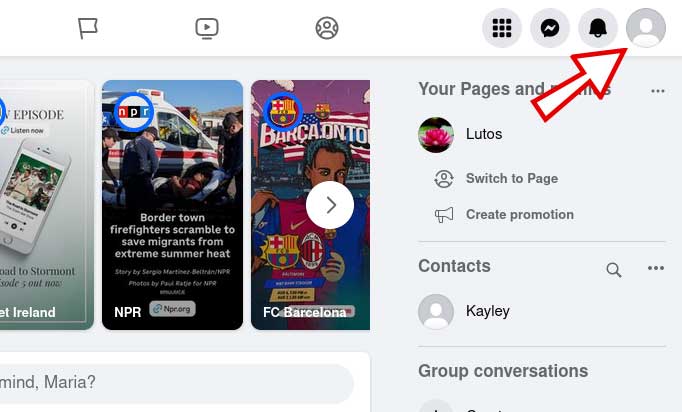
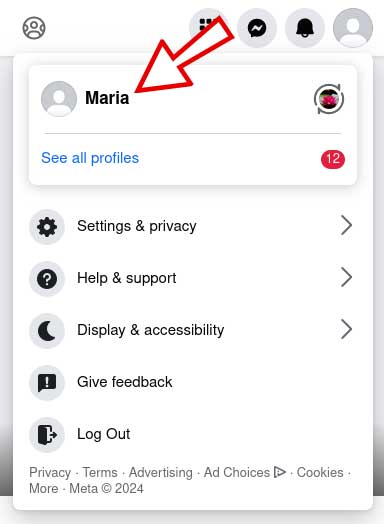
2. Click on your profile picture on the top right, and click on your profile name. If you want to create a photo album on your Facebook page, click the Switch button next to your profile name.
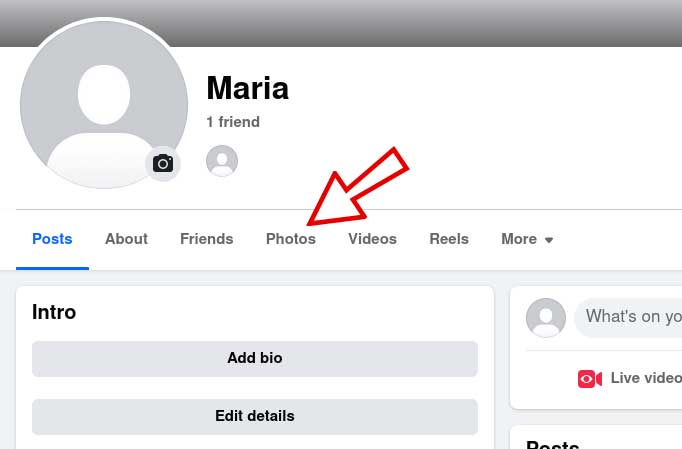
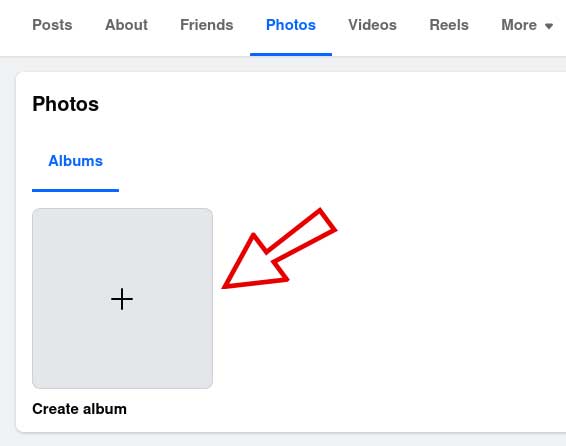
3. Click on the Photos tab.
4. Go to the Albums tab and click the Create album button.
5. Set the title and privacy settings for the new album.
6. Click the Upload Photos or Videos button and then select and upload the photos or videos you want.

7. Optional: You can enter desired descriptions for each of the items, specify the time or place where the photo was taken, or click on the photo to tag the people you want. If an image is not displayed correctly, you can click on the three dots on the top of the photo and use the Rotate buttons to rotate it in the desired direction. You can also change the order of the items by holding the mouse button on each item and moving it.
8. Finally, click the Post button to create your album.

How to create a Facebook photo album on mobile
1. Open the Facebook application.
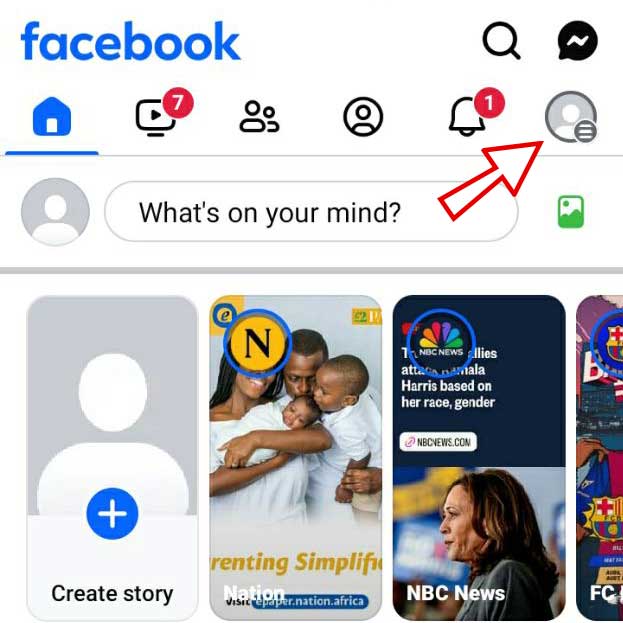
2. Tap your profile picture in the top right.
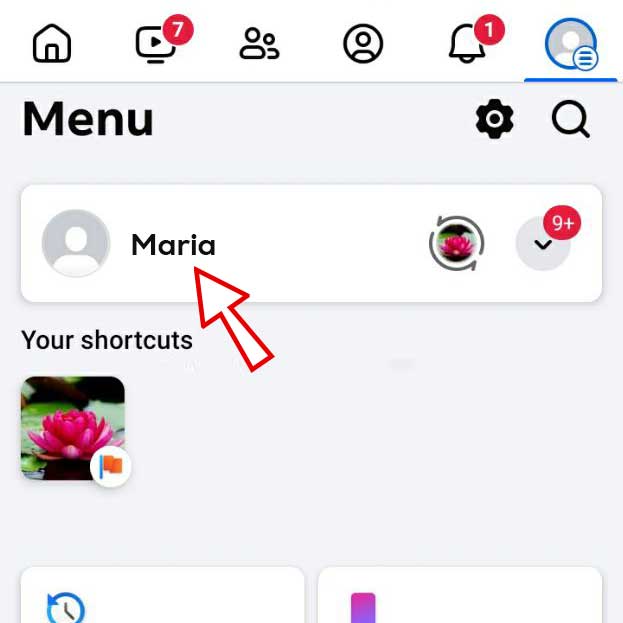
3. Tap on your profile/page name.
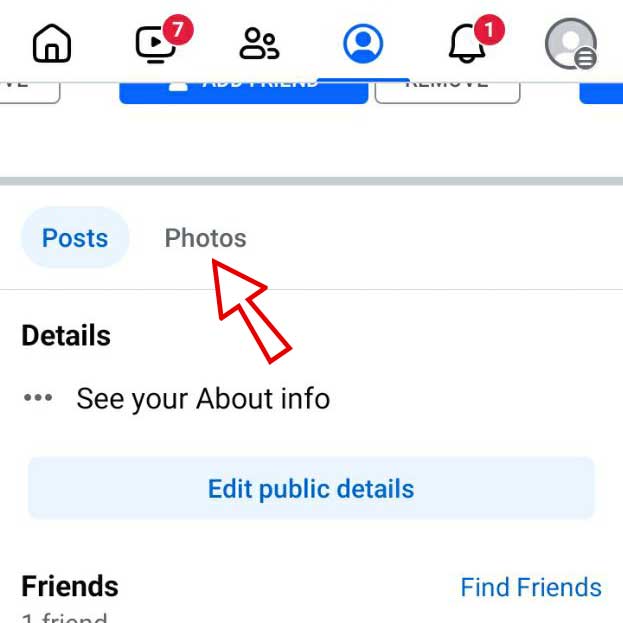
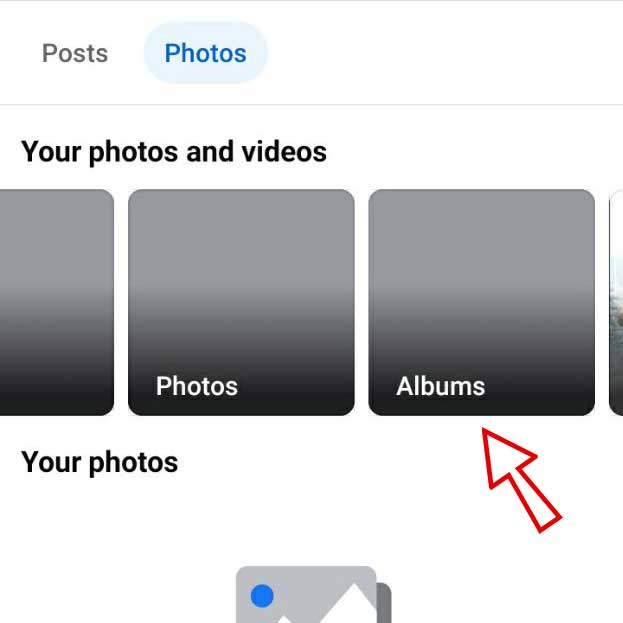
4. Scroll down and tap Photos.
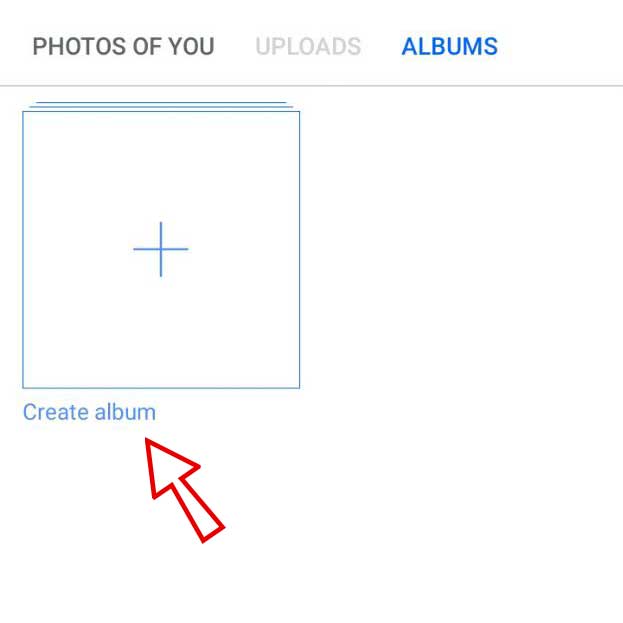
5. Tap on Albums and tap on the Create Album button.
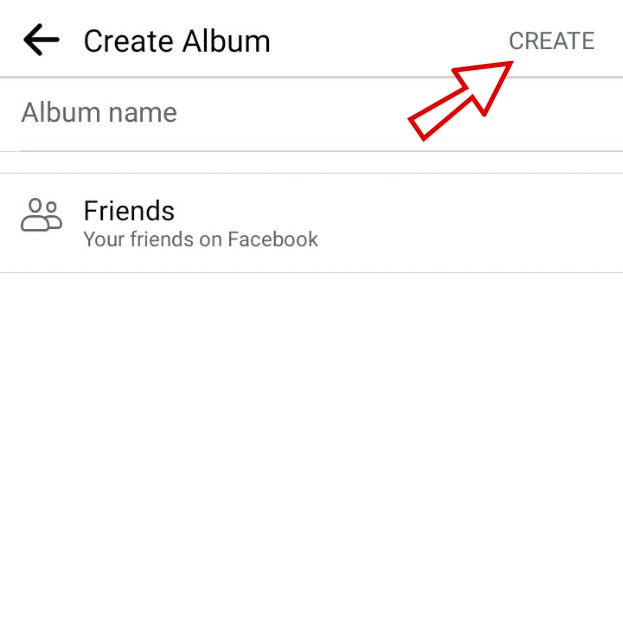
6. Specify the album’s name and who can access it, then tap Create.
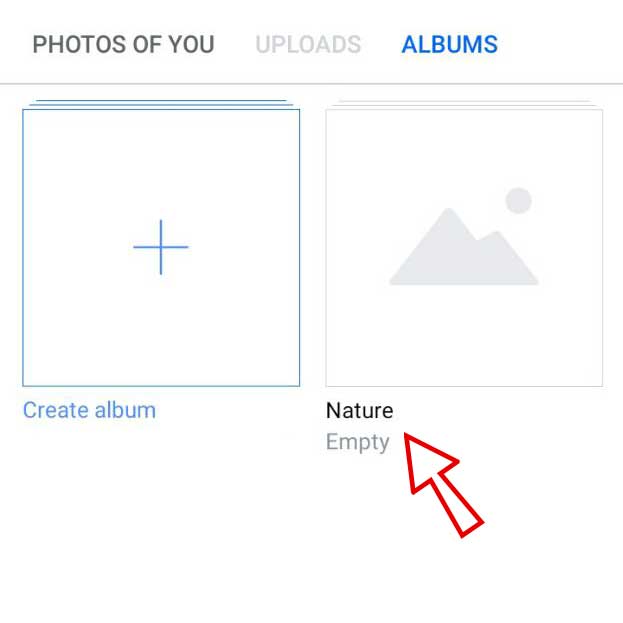
7. In the list of albums, tap on the new album’s name.
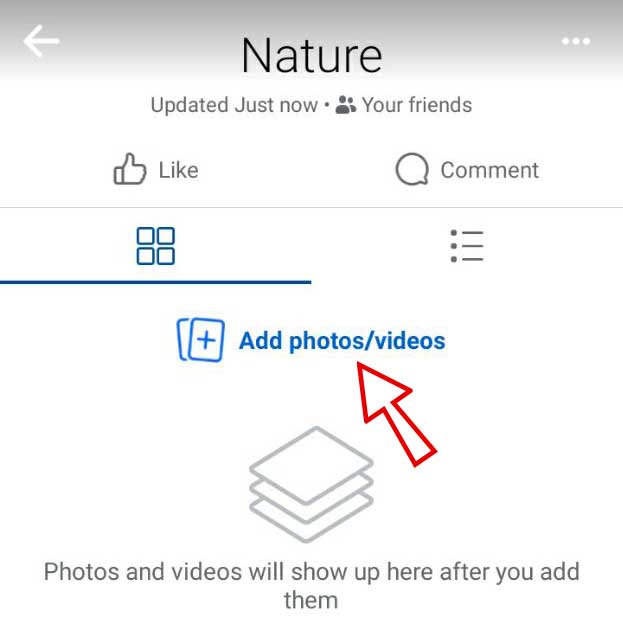
8. Tap on Add photos/videos, select the photos or videos you want.
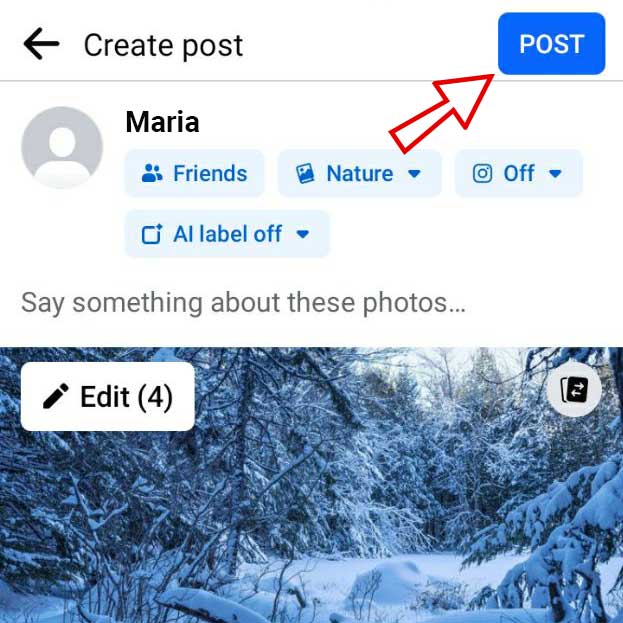
9. Optional: You can enter a description for the new album, edit the photos, specify the time or place of the photo, or click on the photo to tag the people you want.
10. At the end, tap the Post button at the top of the page to create your new album.
Use cases of Facebook photo album
Personal use cases
Sharing memories: You can use a Facebook photo album to share special things like pictures from travel, vacations, and events.
Sharing family photos: You can create a photo album of pictures from family events such as birthdays, weddings, graduations, etc. and share it with your family or friends. For privacy, you can specify who can see the photos in this album.
Use as a Backup Space: You can also use Facebook photo albums as a backup storage space. For example, transfer photos from your phone or PC to Facebook photo albums. If you are concerned about privacy, you can set the privacy settings so that others cannot access the album and its photos.
Professional use cases (for businesses and brands)
Share products/services/portfolio: You can create a separate photo album for each product or service and add relevant photos. You can also create a photo album of your portfolio and publish it on your Facebook page.
Sharing events: You can share photos of any event, conference, or project with your audience in the form of an album.
Create Marketing Campaigns: You can use Facebook photo albums to create marketing campaigns and promote your products/services.
Introducing team members or employees: You can create a photo album of team members or employees of your company and publish it on your Facebook page. For example, a photo album of support team members.
Frequently asked questions
How can I delete a Facebook album?
Follow the steps below to delete an album on Facebook:
1. On Facebook, click on your profile picture and then click on your profile name.
2. Click on Photos.
3. Click on Albums and then click on the desired album name.
4. Click on the three dots next to your album’s name and then click on Delete album.
Note: By deleting an album, all the album photos are also deleted and cannot be recovered.
How many photos can I add to a Facebook album?
You can add up to 1000 photos/videos to a Facebook album.
What is the maximum size of the image I add to the Facebook album?
The size of the photo must be less than 15 MB.
Can I move Facebook photos to an album?
Yes, find the photo you want to work with and open it. After that, click on the three dots on the top right and select “Move to Another Album”. Select the album you want the photo to be in and click “Move photo”.
Can I add a video to a Facebook album?
Yes, besides photos, Facebook allows users to add videos to albums.