How to Get Verified on Facebook (Get Verified Badge)
Fake social media pages can be a huge problem for influencers and brands because these pages are usually created to scam, spread false information, or damage the reputation of individuals/brands. For this reason, every influencer or brand needs a way to show their audience that their page/profile is trustworthy.
The Verified Badge next to the Facebook account name indicates that Facebook has verified the identity of the account owner. An account with the Verified Badge is distinguished from fake or unofficial accounts. Also, by seeing this sign, users can be sure that the account they want to follow is not fake and belongs to the person or brand that represents it.
In this post, we will show you the requirements to be verified on Facebook and how to send a verification request.
What is the Facebook Verified Badge?
A Verified Badge is a sign displayed after the Facebook account name that clearly distinguishes pages created by fans or fraudsters.
Many influencers and brands see pages on Facebook that are similar to theirs. These pages may be made for non-malicious purposes, such as creating a fan community, or malicious purposes, such as impersonating or abusing users’ trust. Even if these pages are created for non-malicious purposes, the main page should be distinguished from similar pages because this improves the audience’s trust, and they can find your real profile/page faster.
Facebook shows verified pages/profiles at the top of search results. Therefore, verifying your page on Facebook will make it appear better in related search results, and your audience will have more access to your page.
Requirements for Facebook verification
For your page/profile to be verified on Facebook, in addition to following the terms of service of Facebook, your profile/page must:
Authentic: Must represent a real person, entity, or business.
Unique: Must be the unique presence of the person, entity, or business it represents. Facebook only approves one account per business or person, except language-specific accounts. Note that Facebook does not approve pages and profiles of general interest, such as puppy memes.
Complete: It must be active and have all the necessary details, such as the “About” section and profile picture. You must also have posted at least one post.
Notable: The person, entity, or business it represents must be well-known and highly searched. Facebook will more likely approve your page/profile if featured in multiple news sources and publications.
How to get verified on Facebook
If you are sure that your profile/page has met the requirements to be verified on Facebook, you can send a request for verification to Facebook by following the steps below.
1. Open the verification request page
To start sending a verification request, you must log in to your Facebook account and then go to Facebook’s verification request page.
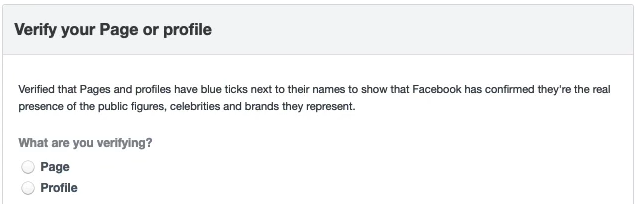
2. Select the profile or page you want to verify
In this step, specify the Facebook profile or page you want to verify. If you verify your Facebook page, tap the Page option in the “What are you verifying” section and select the desired page.
If you want to verify your Facebook profile, you must tap on the Profile option and enter your Facebook profile URL.
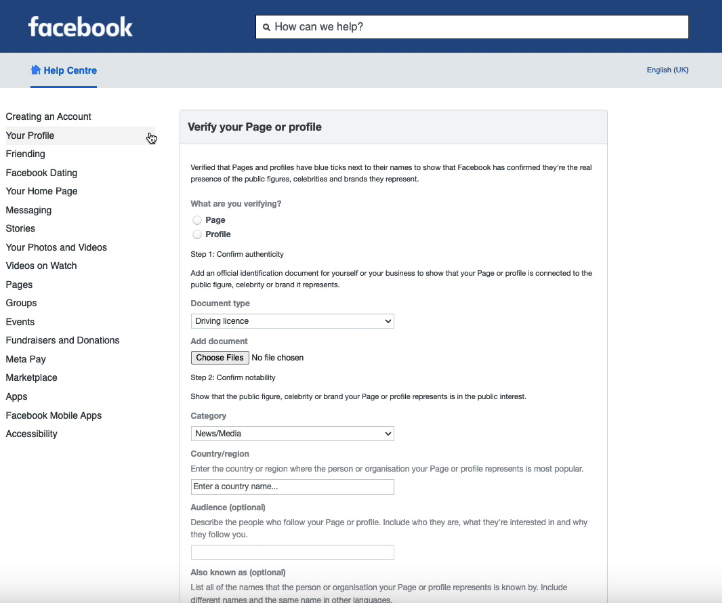
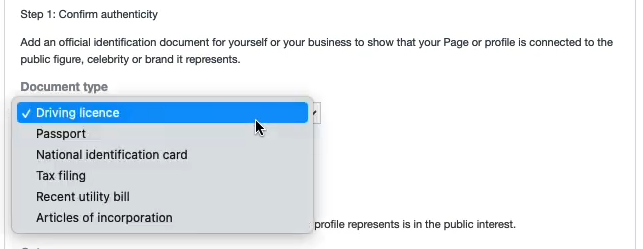
3. Confirm your authenticity
Facebook needs valid documents to approve verification. To prove that you are who you say you are, you must provide a valid identification document such as:
- Passport
- Driver’s license
- National identification card
- Tax filing
- Recent utility bill
- Articles of incorporation
In the Document Type section, select the type of document you intend to submit and then attach a copy of it to the form.
4. Confirm your notability
Facebook is looking to make sure your profile/page is notable, something people are interested in. So, you have to show that your profile/page is significant enough to get the Verified Badge.
In this section, you need to enter some basic information. Completing all the fields is unnecessary, but achieving them will increase your chances of being approved.
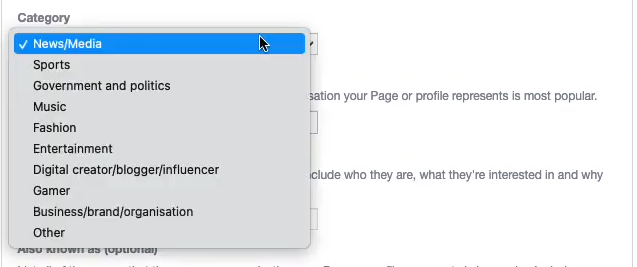
4.1) Select a category (required)
Specify the category of your profile/page. The categories you can choose from are:
- News/Media
- Sports
- Government & Politics
- Music
- Fashion
- Entertainment
- Digital Creator/Blogger/Influencer
- Gamer
- Business/Brand/Organization
- Other
4.2) Add your country (required)
In the Country field, you should enter the name of the country where you or your business is most famous.

4.3) Specify your audience (optional)
By completing the Audience field, you can give information about your audience to Facebook. Like who your audience is, their interests, and why they follow you.

4.4) Enter other names of yourself or your business (optional)
If you or your business is known by different names, you can enter these names in the “Also known as” field. Otherwise, you can leave this field blank.

4.5) Insert links to articles or social media accounts (optional)
You can include up to 5 links to articles or social media accounts to show that your page is in the public interest. Although including links is optional, it dramatically improves your approval chances.
You make a more compelling argument that your page should be approved by including links to your other social media accounts, articles about you or your business, and anything else that proves people like you or your business.
Remember that the links you provide must be independent. Paid or promotional content will not be considered.
At the end, click the Send button to send your request. Wait a few days for Facebook to review your request. It may take from 48 hours to 45 days.

Frequently asked questions
What does the blue tick on Facebook mean?
A blue tick indicates that Facebook has verified the identity of the account/page owner and distinguishes it from fake or similar accounts.
What documents are required to submit a Facebook verification request?
To submit a verification request on Facebook, you must submit a copy of one of these documents to Facebook:
- Passport
- Driver’s license
- National identification card
- Tax filing
- Recent utility bill
- Articles of incorporation
How long does the Facebook verification request review process take?
Facebook has not announced a specific time for reviewing the verification request, but it usually takes between 2 and 45 days to review your request.
What happens if Facebook rejects the verification request?
If Facebook rejects your verification request, it will notify you via email or app notifications. In this message, Facebook explains why the request is rejected and how to resend the request.
Does Facebook account verification cost?
No, Facebook does not charge fees for verifying your account/page.